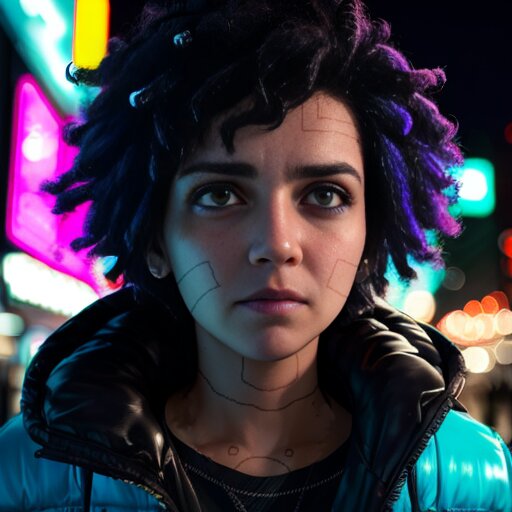
I worked on a headshot of an android with Stable Diffusion Webui. I wanted it to look quite human but with some features that were a bit off, like panels and plastic-y skin (think Data from Star Trek: The Next Generation). So I started with a regular person. The setting is at night in the city with neon lighting. I wanted curly dark hair, for a change. Puffy jackets are the best so I put that in the prompt too. 🙂 Here’s the starter shot I settled on:

Next I needed to “androidize” the character. I used GIMP to draw lines on the face and neck so that Stable Diffusion would have some direction in how to make the features more robotic. I ditched the earrings, too.
I ran this through Stable Diffusion’s img2img inpainting, so that only the skin parts would be changed. I ended up getting good results for the neck but not the face. I finally discovered that the face restoration (Codeformer) was “fixing” the lines on the face! I ended up merging my input with one of the inpainting outputs that had a good neck. I darkened the lines on the face some.

Time to upscale using img2img! That turned out pretty well, with the panels on the face having a slightly different shade that makes them look less like skin and match the neck. The eye on the left ended up kinda gimpy, though, probably due to the face restoration being switched off.

Now to fix the eye and work on the expression more. I wanted a slightly concerned look. I inpainted only the eye area so I could turn on the face restoration again. Here’s what I settled on, with some gently knit eyebrows. 🙂
Still a little too human-looking for my taste. I thought I’d tinker with the eyes because any changes there should immediately ring “not human” alarm bells. I used GIMP to draw some yellow lines in the eyes.

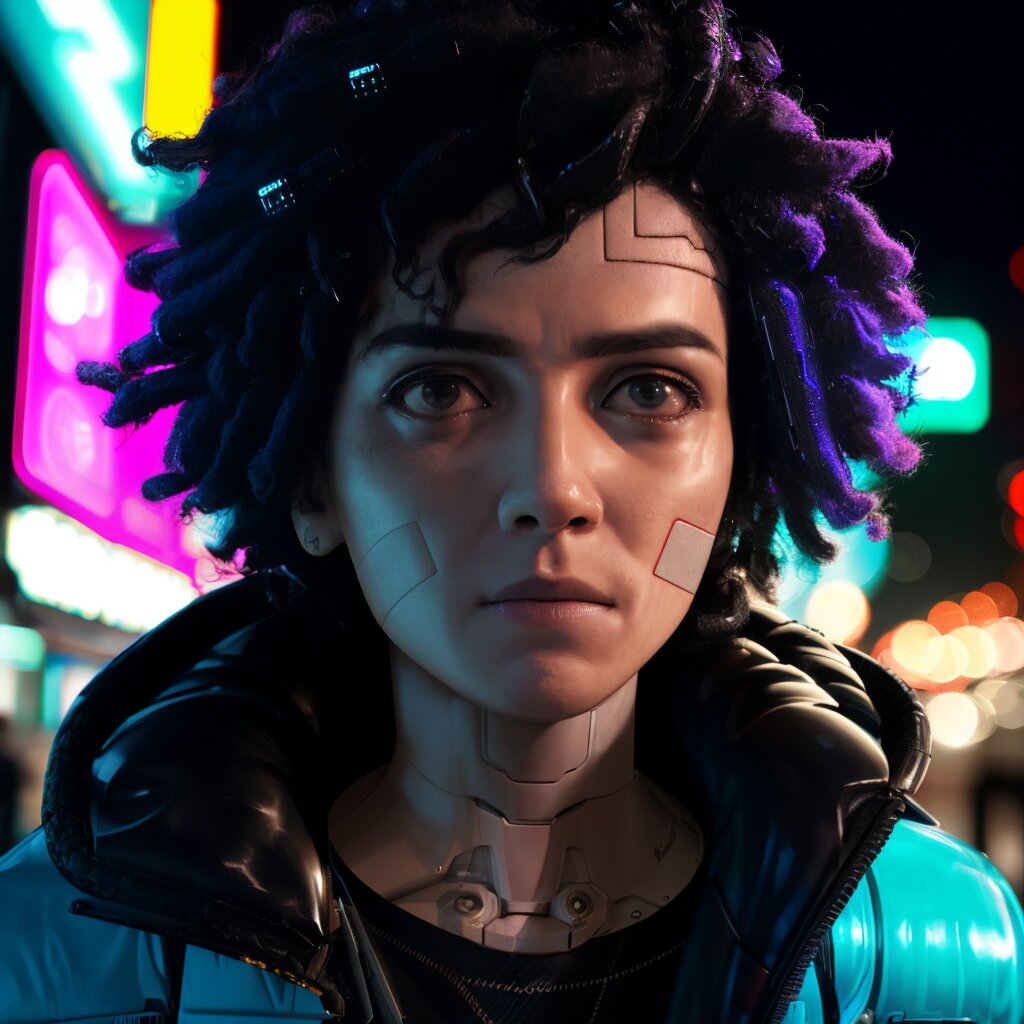
Finally I inpainted just the eyes themselves with a low “Denoising strength” so that the lines would look more organic while retaining some angularity. Here’s the end result:
